


Hey there! As a supplier of A6VM Motors, I know how crucial it is to conduct thorough inspections before using these motors. In this blog, I'll walk you through the essential inspection items for an A6VM Motor before you put it to work.
1. Visual Inspection
First things first, give the A6VM Motor a good visual once - over. Look for any obvious signs of damage, like cracks in the housing. A cracked housing can lead to leaks and a loss of hydraulic pressure, which will mess up the motor's performance. Check the mounting holes too. If they're damaged or misaligned, it'll be a real pain to install the motor properly, and it might not work as it should.
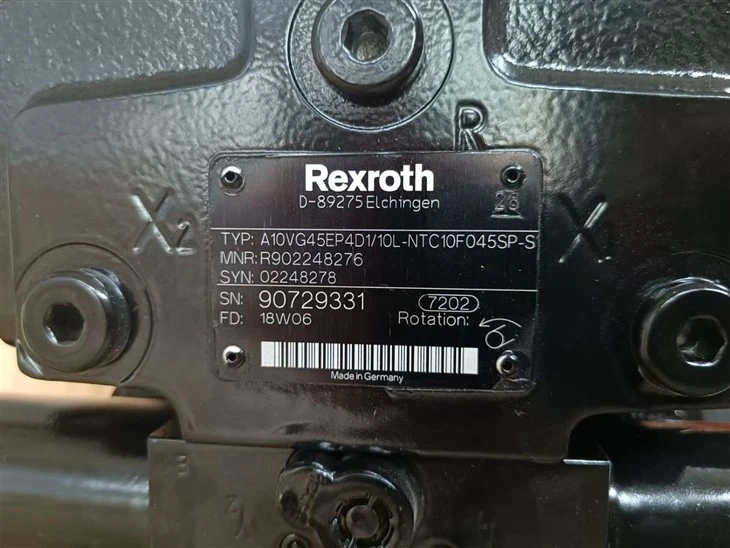
Also, take a look at the shaft. It should be straight and free from any dents or scratches. A damaged shaft can cause vibrations and premature wear of the motor's internal components. And don't forget to check the seals. Leaky seals are a common problem, and they can let hydraulic fluid out and contaminants in. You can find more about hydraulic motors like A10VG45EP4D1/10L - NTC10F045SP - S R90729331 Hydraulic Motor For Original Rexroth Rotary Drilling Rig on our website, which also follow similar visual inspection steps.
2. Check the Hydraulic Connections
The hydraulic connections on the A6VM Motor are super important. Make sure all the ports are clean and free from debris. Any dirt or particles in the ports can block the flow of hydraulic fluid and cause the motor to malfunction. Tighten all the connection nuts to the recommended torque. Loose connections can lead to fluid leaks, which not only waste hydraulic fluid but can also be a safety hazard.
Inspect the hoses that will be connected to the motor. Look for any signs of wear, such as cracks or bulges. Damaged hoses can burst under pressure, and that's definitely not something you want. If you notice any issues with the hoses, replace them immediately. We also have A4FM28/32W - NSC02 - S Hydraulic Motor of Rexroth in Stock, and the same rules apply for its hydraulic connections.
3. Verify the Rotation Direction
Before you start using the A6VM Motor, it's essential to verify the rotation direction. You can do this by checking the motor's markings. Most motors have an arrow indicating the correct direction of rotation. If you install the motor with the wrong rotation direction, it won't work as expected, and it could even damage the motor and the equipment it's connected to.
If you're not sure about the rotation direction, you can consult the motor's manual or give us a shout. We're here to help you get it right.
4. Check the Hydraulic Fluid
The quality and quantity of the hydraulic fluid are key factors in the performance of the A6VM Motor. First, check the fluid level in the reservoir. It should be within the recommended range. If the fluid level is too low, the motor might not get enough lubrication, which can lead to overheating and premature wear.
Inspect the fluid for any signs of contamination. Contaminated fluid can contain dirt, water, or other particles that can damage the motor's internal components. If the fluid looks cloudy or has a strange odor, it's a sign that it needs to be changed. Make sure to use the right type of hydraulic fluid recommended by the manufacturer. Using the wrong fluid can cause problems like poor lubrication and increased wear. You can learn more about maintaining hydraulic motors like our A6VM Motor on our website.
5. Test the Relief Valve
The relief valve is an important safety feature of the A6VM Motor. It's designed to prevent the hydraulic pressure from getting too high, which could damage the motor and the hydraulic system. To test the relief valve, you'll need some specialized equipment. You can gradually increase the hydraulic pressure and observe the pressure at which the relief valve opens.
The opening pressure should be within the specified range. If the relief valve opens too early or too late, it needs to be adjusted or replaced. A malfunctioning relief valve can put the motor and the entire hydraulic system at risk.
6. Inspect the Internal Components (if possible)
If you have the expertise and the right tools, you can inspect the internal components of the A6VM Motor. This includes the pistons, cylinders, and valves. Look for any signs of wear, such as scoring or pitting. Worn - out internal components can cause a loss of power and efficiency in the motor.
However, this kind of inspection is more advanced and should only be done by trained professionals. If you're not confident in doing it yourself, you can send the motor to a qualified repair shop for a thorough inspection.
7. Check the Electrical Components (if applicable)
Some A6VM Motors may have electrical components, such as sensors or solenoids. Check these components for any signs of damage or malfunction. Make sure all the electrical connections are secure and free from corrosion. A loose or corroded electrical connection can cause problems like incorrect sensor readings or failure of the solenoids.

If you encounter any issues with the electrical components, you can refer to the motor's electrical diagram or contact us for assistance.
Conclusion
Inspecting the A6VM Motor before use is a must - do to ensure its proper operation and longevity. By following these inspection items, you can catch any potential problems early and avoid costly repairs and downtime.
If you're in the market for an A6VM Motor or have any questions about the inspection process, don't hesitate to reach out to us. We're a reliable supplier of high - quality hydraulic motors, and we're committed to providing you with the best products and services. Whether you need help with installation, maintenance, or just have some general questions, we're here for you. Let's get your equipment up and running smoothly with our top - notch A6VM Motors.
References
- Rexroth Hydraulic Motor Technical Manuals
- Industry Standards for Hydraulic Motor Inspections


